


Ceiling wallpaper has gone from niche curiosity to a genuine interiors trend. A well-chosen design overhead transforms a flat, forgettable space into something you actually notice.
The catch? Ceilings are less forgiving than walls. Gravity is not on your side, the edges are never quite straight, and you've got light fittings to navigate. Get the prep and measurements right, though, and it's absolutely doable as a DIY project.
This guide covers everything: choosing the right material, calculating exactly how much you need, prepping your ceiling, installing panel by panel, cutting around lights and coving, and troubleshooting if something goes wrong.
What makes ceiling wallpaper different (and why it works)

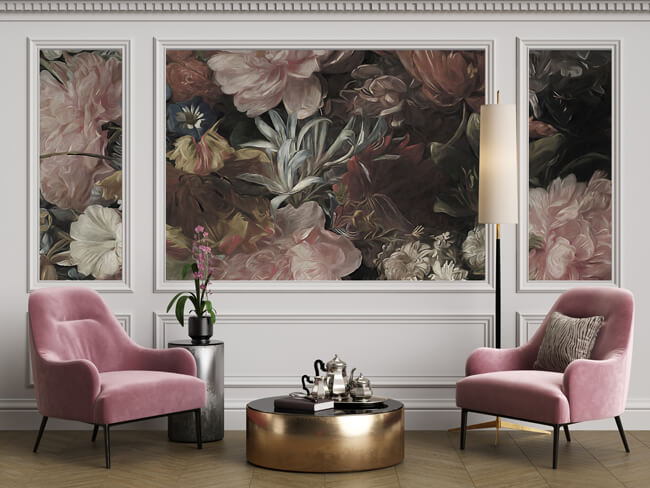
Mural: 'Garden Whispers' by Carol Robinson
The phrase "fifth wall" has stuck because it reframes how we think about ceilings: not as blank overhead space, but as a surface with real design potential. When you paper a ceiling, you draw the eye upward, which has a surprising effect on how a room feels. Low ceilings appear more interesting and intentional. High ceilings gain warmth and intimacy. Cornicing and pendant lights get spotlighted rather than ignored.
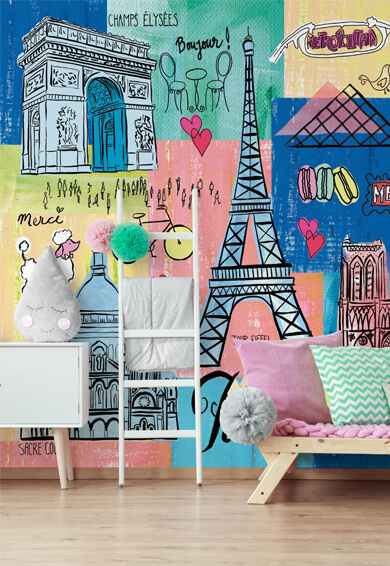
It works in almost any room. Bedrooms benefit most from calm, immersive designs that wrap you in atmosphere. Hallways can handle something bolder, a dramatic floral or a deep geometric, because the ceiling is glimpsed rather than stared at. Nurseries are ideal for playful illustrated murals above the cot. Even bathrooms can work, provided you choose a moisture-resistant material.
Browse our ceiling wall murals for a sense of what's possible across all these spaces.
Choosing the right type of ceiling wallpaper

Mural: 'Antique World Map' by Lovell Johns
Two main formats come up repeatedly: peel and stick, and paste-the-wall.
Peel and stick ceiling wallpaper is repositionable, requires no paste, and leaves no residue when removed. That makes it an obvious choice for renters or anyone who wants to reverse the decision later. The trade-off is that the adhesive backing has limits on very textured or porous surfaces, so a smooth, primed ceiling is non-negotiable. For more on why peel and stick is so popular, the six benefits of peel and stick wall murals post is worth reading before you commit.
Paste-the-wall (traditional) materials are generally more robust overhead. A heavier, non-woven material applied with wall paste tends to bond more securely, which matters when gravity is working against you. This is the format most professional decorators default to for ceilings.
For finish, matte wins overhead. Sheen or satin finishes catch overhead lighting in unpredictable ways, highlighting every slight imperfection in the ceiling surface. A flat, matte material reads cleaner from below.
For renters specifically, the wallpaper ideas for renters guide covers damage-free options in more detail.
Picking a design that works

Mural: 'Blue Marble Effect'
Viewing wallpaper overhead is completely different from viewing it on a wall. You're further away, the perspective is foreshortened, and you're often looking at it in low or artificial light. A few principles help:
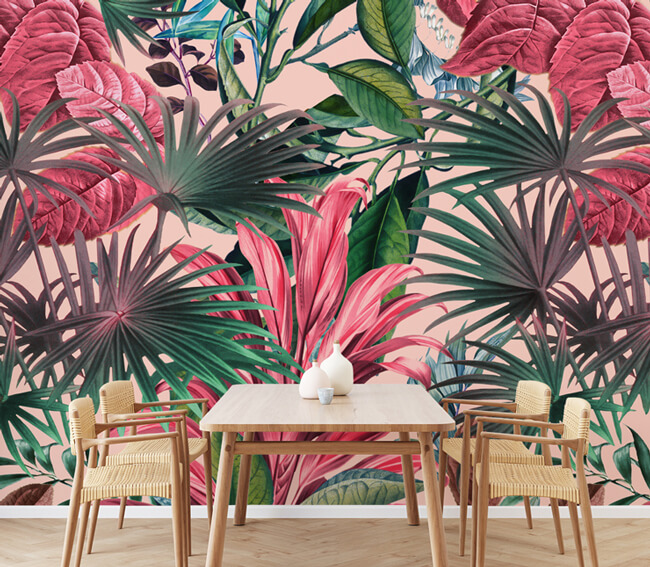
- Scale up. Fine micro-patterns disappear from ceiling height. Medium-to-large scale designs read clearly. A floral mural with generous blooms works far better overhead than a delicate ditsy print.
- Watch the colour under your lighting. Dark ceilings in a room with warm-white bulbs create a cocooning effect. The same design under cool natural light reads completely differently. Test a sample if you can.
- Mood by room. For the bedroom, think soft botanicals, painterly skies, or abstract textures. Hallways can handle geometric drama or a bold mural. A nursery ceiling is a gift: stars, clouds, a jungle canopy above the cot.
Preparing your ceiling

Mural: 'A Detailed Look at Spiral Galaxy M101' from the NASA collection
Good prep is what separates a ceiling job that lasts from one that peels at the edges within weeks.
- Fill any cracks with filler, sand smooth, and allow to dry fully.
- Remove any loose or flaking paint. A fresh skim coat is ideal if the surface is badly uneven.
- Wipe down the ceiling to remove dust, grease, or nicotine residue.
- Prime bare or porous sections so the paste or adhesive gets consistent bite.
- Cover all floors and furniture with dustsheets.
- Plan your ladder or hop-up positioning before you start. A second pair of hands is strongly recommended for ceiling work.
For any work near light fittings or ceiling roses, switch off the mains power at the consumer unit first. Do not touch wiring unless you are a competent person. This is not a step to skip.
Installing ceiling wallpaper: the key steps
The single most important move in wallpapering a ceiling is getting the first strip straight. Ceiling edges are almost never actually straight, so snapping a chalk line or using a laser level gives you a reliable guide rather than chasing a crooked edge.
For paste-the-wall material:
- Paste the ceiling surface in a strip slightly wider than your paper.
- Fold the strip in loose accordion folds, paste-to-paste, for ease of handling.
- Unfold section by section as you work across the ceiling, smoothing with a wallpaper brush or smoothing tool.
- Trim neatly at coving or wall edges with a sharp craft knife and straight edge.
For peel and stick:
- Peel back the backing paper gradually as you position each section.
- Smooth firmly with a squeegee to avoid air pockets forming.
- Trim at edges.
For a more detailed walkthrough of the general process, the how to hang wallpaper guide applies many of the same principles.
Cutting around light fittings and ceiling roses
Light fittings are the trickiest obstacle on any ceiling. Once the wallpaper is in position over the fitting, gently smooth the paper down until you can feel the shape of the fitting below, then make small relief cuts radiating outward from the centre (like a star). This lets the paper sit flat around the fitting without puckering.
For pendant lights with a ceiling rose:
- Turn off mains power at the consumer unit before you start.
- Unscrew the canopy or rose cover and slide it down the flex.
- Paper over the hole, making your star cuts, then feed the flex back through and reinstall the canopy to cover the cut edges neatly.
Never attempt this with live wiring, and if you're uncertain about the fixture, call a qualified electrician.
Coving and edges: where most DIY attempts unravel
Coving creates a curved transition between wall and ceiling that has no clean right angle to trim into. The standard approach is to butt the wallpaper neatly to the bottom edge of the coving, scoring and trimming precisely rather than trying to wrap the paper around the curve.
The key is maintaining your straight guide line throughout the job. If your first strip drifts even slightly, every subsequent strip compounds the error. Check alignment frequently, especially on longer runs.
Seams between strips should be butt-joined (edges meeting without overlap) rather than lapped, which creates a visible ridge when dry.
Troubleshooting: bubbles, seams, and misalignment
Small bubbles often disappear as the paste dries, so resist the urge to poke at them immediately. If a bubble persists after 24 hours, carefully lift the nearest edge, apply a little fresh paste, and smooth back down.
Loose edges typically mean the surface wasn't primed properly, or the ceiling is too porous. A small brush to work fresh paste under the edge and press down usually rescues it.
Misalignment is almost always caused by the first strip not being straight, or by a pattern repeat that wasn't accounted for in the cutting stage. For textured ceilings (Artex or similar), extra filling and priming beforehand is essential; the texture creates uneven adhesion and the surface imperfections will telegraph through lighter materials. See six wallpaper problems and how to fix them for more solutions.
Ceiling wallpaper ideas worth copying
If you're still deciding on a direction, here are the styles that work best overhead:
- Botanical and floral: A large-scale floral overhead in a bedroom adds an almost canopy-like feel. Soft pinks, dusty greens, and cream backgrounds keep it calm rather than busy. Explore the botanical wallpaper range for options at the right scale.
- Sky and cloud murals: A classic for nurseries and living rooms; instantly transforms how the room feels by opening the ceiling up.
- Geometric and textured: Hexagons, trellis patterns, and surface texture wallpaper work well in hallways and kitchens where you want interest without committing to a figurative scene.
- Fine art: A single panoramic image printed edge to edge across the ceiling makes the strongest statement. Pair with warm brass or black pendant fittings and pale walls to let the ceiling do the work.
For room-by-room design advice, how to choose wallpaper for every room covers the principles well.
Which style of ceiling wallpaper would you decorate your fifth wall with? Comments are welcome in the section below.

Latest Social